In many situations, you can easily enable motherboard HDMI, in such cases when your graphics card has limited ports or even if the graphic card is damaged and have a warranty. Generally, allowing the motherboard to HDMI means checking that your CPU has integrated graphics or these graphics are absent. If your CPU has integrated graphics, you can enable it from the IGPU multi-monitor named option you will find in the advanced setting when you search in your computer’s BIOs. After selecting the setting to save it, restart your computer and install the latest graphic integrated design.
Table of Contents
Enabling The Motherboard HDMI:
When you have a graphics card, you have to make sure that all your displays are connected with it already. But in the case of having motherboard HDMI warranties, you can enable it very quickly. You have to follow the steps given below:
- Check the integrated graphics from your CPU
- From BIOs enable the integrated graphics
- Connect your monitor again
- Install the latest integrated design of graphics driver
Below, you will get details about every step you follow to enable an integrated graphics driver. But the last step depends on you, which means it’s up to you if you want to install a graphics driver; you can, but if you don’t want to, skip the last step.
Method 1: Check the integrated graphics from your CPU
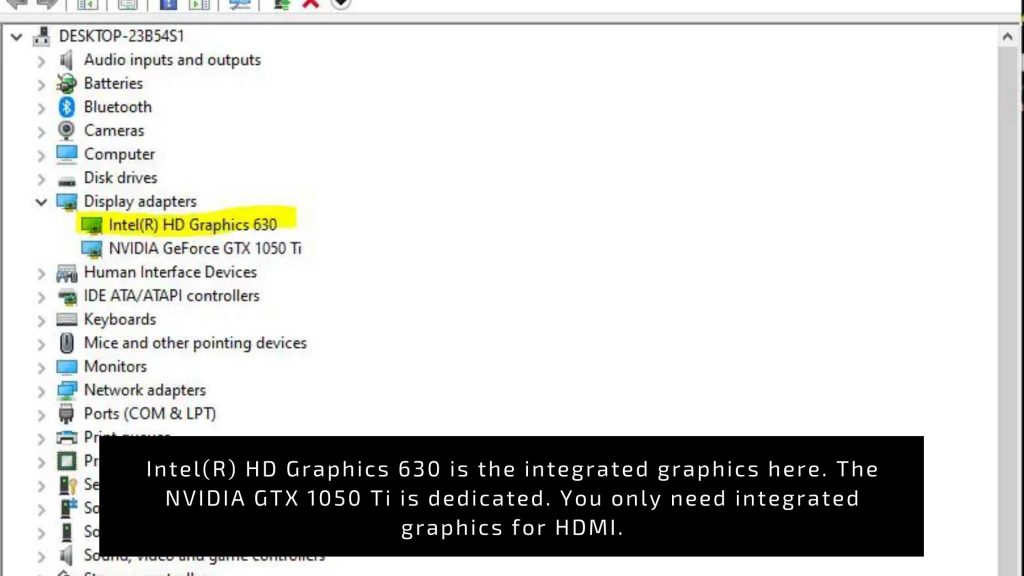 It’s not a surety that your PC has an integrated graphics design, so the first step is to check it. Checking the integrated graphic design is important because the HDMI port present on the motherboard will run with the help of integrated graphics, not GPU.
- In your Windows 10, go to the settings.
- Open the about option and look for the processor.
- Google the processor model number and check whether it has integrated graphics or not.
Method 2: Enable Integrated Graphics in BIOS
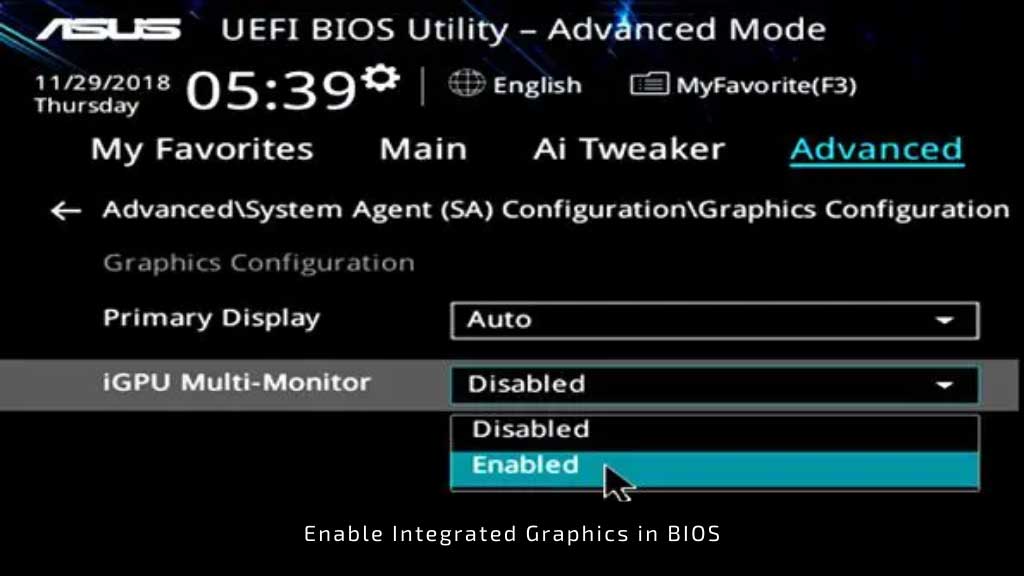 After confirming that you’re CPU have integrated graphics, you can now follow the steps given below:
- Open BIOS and turn on the integrated graphics setting option.
- Save all your computer work and then reboot it.
- Bring the BIOS by pressing the key when your computer restarts.
- The most common keys to use are ESC, Delete, F1, F2, F8, or F12.
- While navigating through the BIOS, you have to be very careful. Every motherboard has a different BIOS, so make sure to see if the setting suits your motherboard.
- Go to advanced settings; find the GPU multiple display settings.
- Enable the setting if it is disabled. It will turn on the motherboard HDMI.
- Press enter to confirm and save your changes.
- Restart the computer to apply changes.
Method 3: Connect your Monitor again
- Plugin your primary monitor with the HDMI port present at the back of the video card.
- Connect the secondary monitor with the HDMI port of the motherboard.
- Plug the other ends of the HDMI cable with the monitors.
- Your monitors are detected when you boot your system.
- Right-click on the desktop and select the display setting that will configure all your displays.
- You can rearrange various settings related to monitoring from the menu.
Method 4: Installation of latest integrated graphics driver
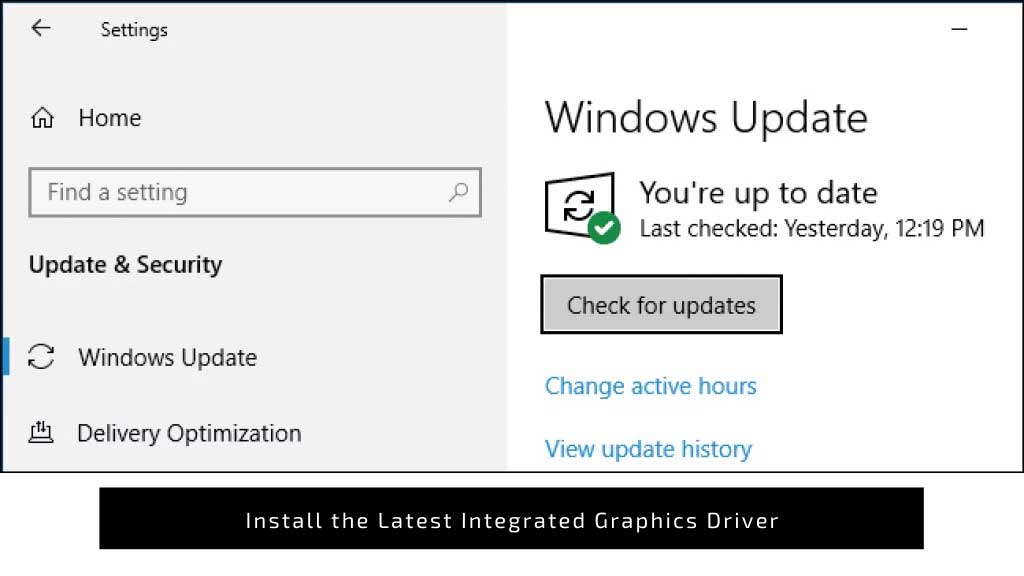
- In windows, open the device manager.
- In the section of other devices, you will click on the unidentified device.
- From the download website, you can install the latest drivers.
- After installing, please restart your computer, and your secondary monitor will detect it.
Why Enable Motherboard HDMI?
There are many advantages of upgrading to a motherboard that has HDMI ports, such as the ability to connect additional monitors or projectors. If you have an older graphics card and it’s now damaged or doesn’t offer any port at all for connecting with your primary monitor, then installing on board HDMI will give you more flexibility in terms of how much screen real estate is available when working from home.
It is the ability to connect additional monitors to your system that is the biggest advantage of enabling motherboard HDMI.
If you have a GPU installed, it can have either one HDMI port or several. This is because of the difference in technology between motherboards and GPUs.
What if your graphics card’s HDMI port is damaged or it doesn’t have an HDMI port at all? If that’s the case, then you’re in luck because there are more ports on motherboards to connect monitors.
The only thing better than having an extra monitor is using that second screen to get work done faster. With just one HDMI port on motherboards, it can take some creative wiring and a lot of patience – but not anymore! By enabling the motherboard’s onboard HDMI output you’ll be able to wirelessly connect up two monitors for fast multitasking with easy access from anywhere in your space.
Conclusion:
While enabling the motherboard HDMI, always pay attention to how many monitors you want to set up. This depends on your GPU. If it has multiple HDMI ports connect the monitors with it.